DIY Faux Aged Clay Pot
This DIY Faux-Aged Clay Pot tutorial allows you to create a beautiful faux-aged clay pot out of any glass container you have. It is a perfect project for that thrift store finds.
In our home, I love the patinas of the old world look along with the stone finishes that bring in a natural element. Having them set about the house creates a beautiful earthy aesthetic that only aged or worn items can do.
Naturally, real aged clay pots are not a cheap thing to come by and while I love them tremendously; I do not have the budget for such extravagance. However, I am happy to share with you an idea that came to me after dry brushing my interior doors to make them appear aged. I used a similar concept for these faux-aged clay pots that I am going to be showing you in this post.
Today I will be using a few thrift glass vases and an empty glass coffee container to demonstrate that you can use just about any sort of glass container you can think of for this DIY project. Some other ideas are wine bottles, water jugs, jelly jars, and older garden pots or bowls. There are two ways to create these faux-aged clay pots, let’s start with the first one.
Complete How-To Video
*Disclaimer: This post may contain affiliate links, which means I may receive commissions if you choose to purchase through links I provide (at no cost to you).
Faux Clay Pot #1
This look creates a bit more texture than faux-aged clay pot #2 (below) and replaces the spray painting step in exchange for applying joint compound. The result is a more textured finish to the faux aged clay pot and when painted leaves an authentic-looking finish.
What You Will Need For Faux Aged Clay Pot #1
Matte Clear Coat Finishing Spray
Tools
a glass container or vase
gloves
paper plate
paper towels
cardboard or something to protect your workspace
Directions
By removing any stickers that might be on your container. Lay down something to protect your work area like newspaper, cardboard, old paper grocery bags, etc. I highly recommend working outside if possible for ventilation purposes. Using gloves, scoop and cover the entire vase with the joint compound. The nice thing about this DryDex Joint Compound is that it goes on pink and dries white. So you know it’s ready.


When ready, wet a bundle of paper towels and ring them out to where they feel damp to the touch. Pour both chalk paint colors you are using on a paper plate. Then begin dabbing the paint on using the damp paper towels as your applicator. Continue dabbing the chalk paint on until you achieve the desired color tone you are wanting.
This technique is very forgiving, so if you have too much dark, just apply more light and vice versa. Dab until the entire vase is covered. I find once I get a full coat on, I allow it to dry for a few minutes then continue to do the final dabbing.
This way the joint compound doesn’t get too wet and begins flaking. If you find it is flaking, allow that side to dry a bit before continuing. You can cover any flaking with the paint or you can apply more joint compound to patch if needed. If you do this make sure to allow it to dry white before applying the paint.

When your vase looks fully covered in the desired color tone and look you want. Allow it to dry completely. Finish it off with matte spray clear coat paint to ensure the finish is protected.
Faux Clay Pot #2
This faux-aged clay pot is a fantastic and simple way to achieve a clay pot look to any vase you chose. I prefer making them this way as I am impatient when waiting for the joint compound to dry. It seems to take longer than the spray paint in this version. However, as I mentioned above the texture isn’t as interesting as faux aged clay pot #1. But it does make a really lovely faux-aged clay pot nonetheless.
What You Will Need for Faux Aged Clay Pot #2
Rust-Oleum Flat Black Spray Paint
Rust-Oleum Matte Clear Finishing Spray
Tools
a container or vase
gloves
paper plate
paper towels
cardboard or something to protect your workspace
Directions
For this DIY faux-aged clay pot, you will start by removing any stickers just the same as the first pot. Protect your work area and if possible work outside. Especially for this one because we are using spray paint on this. Once your work area is protected and well-ventilated (hopefully outside). Spray a coat of matte black spray over the entire vase or container that you are using. Allow it to dry completely.

When your container is dry we are going to repeat the exact steps for painting on the chalk paint as above: When ready, wet a bundle of paper towels and ring them out to where they feel damp to touch. Pour both chalk paint colors you are using on a paper plate. Then begin dabbing the paint onto the container using the damp paper towels as your applicator.
Continue dabbing the chalk paint on until you achieve the desired color tone you are wanting. This technique is very forgiving, so if you have too much dark, just apply more light and vice versa. Dab until the entire vase is covered. I find once I get a full coat on, I allow it to dry for a few minutes then continue to do the final dabbing.


When your vase looks fully covered in the desired color tone and look you want. Allow it to dry completely. Finish it off with matte spray clear coat paint to ensure the finish is protected.
Add greenery, faux flowers, branches, beautiful stems, or whatever you like to your faux-aged clay pot. Or make these faux-aged clay pots for a stylish herb garden.
Shop This Post
DryDex Spackling Joint Compound
Rust-Oleum Matte Clear Finishing Spray
Rust-Oleum Flat Black Spray Paint
Pin For Later

Check Out More Favorites From The Farmhouse!
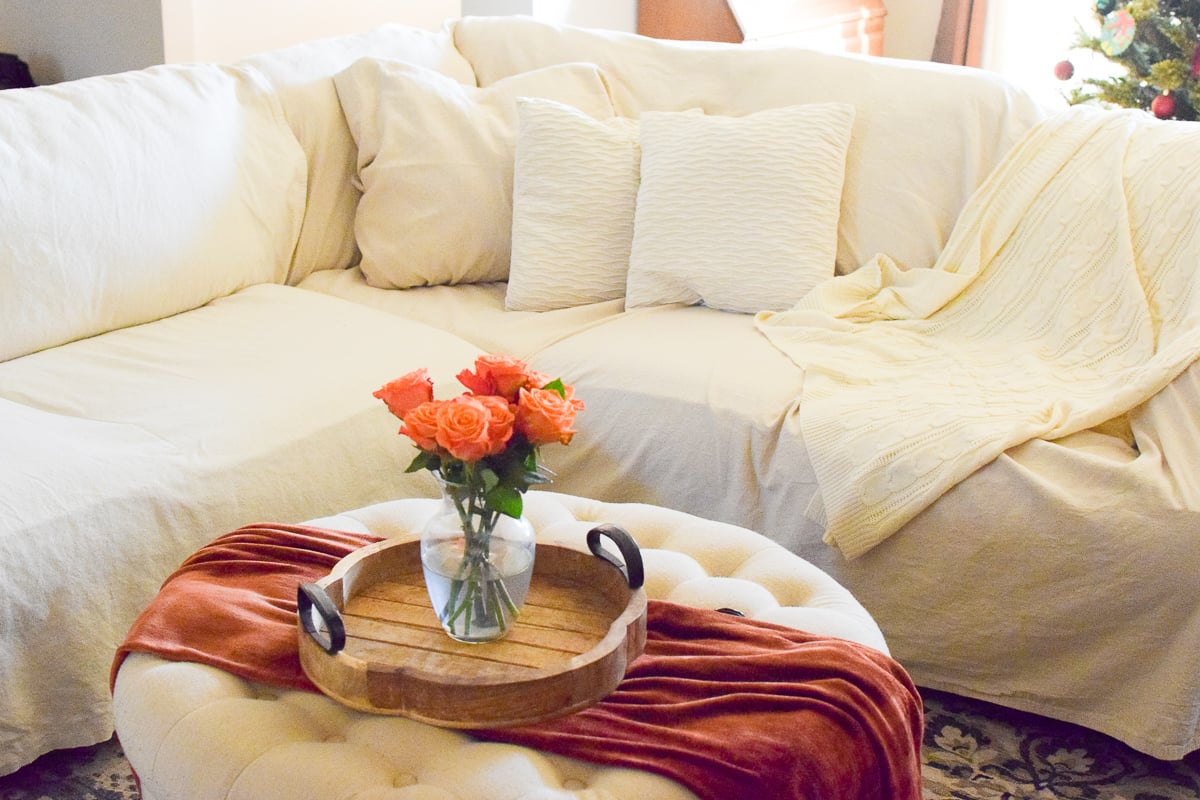
DIY Drop Cloth Now Sew Slip Covers for a Couch or Sectional