How To Stretch and Fold Sourdough (With Video)
Everything you need to know on how to do the stretch and fold method for sourdough to improve the quality of your sourdough loaves.

One of the best ways to improve your sourdough baking skills is to use the stretch and fold method. I realize that for most of us home bakers, this can seem a little intimidating but let me reassure you that it is anything but complicated. When done correctly, this method will help strengthen the gluten while gently fusing air into the dough. The best part is, is that this is done without doing any kneading whatsoever and the result is an elevated rise and an open crumb.
For the longest time, I refused to incorporate any changes into my sourdough skill set. It was as if I had figured out what worked and decided to stick with it. Well, actually, that is exactly where I was before grabbing a bread-baking book at my local library. I don’t even recall why I grabbed it. I knew how to make several sourdough recipes with my sourdough starter. So what was the point?
But like fate, I did, and when I came across the photos of a man standing in an apron, hands in the dough completing his last stretch with a baker’s tip written sharing the process. I knew I had happened upon something I had to try myself. He made it look so easy and his sourdough loaf was proof that this technique was next level.
What Stretch and Fold Means
Stretch and fold refers to a simple folding process that involves sets of stretching the dough and an equal series of folds that are done to help develop dough strength. This is achieved through a sequence of intervals and works especially well for high-hydration doughs that are sticky and hard to handle. You can see the development of the dough through each interval. Usually, it begins with a sticky messy dough and ends with a perfectly formed dough ball.
What It Does For Sourdough
The stretch and fold method helps strengthen the gluten network and gently incorporate air into the sourdough dough. It works best in high hydration doughs however, it can be used in lower percent hydration recipes. With a strengthened gluten structure this will result in a lofty rise to the bread and a dough that is much easier to handle. Furthermore, the air incorporated will result in a more open crumb and an overall better sourdough loaf. What is essentially happening is that gluten strands are forming after contact with water.
Those strands get stretched and folded over in intervals that help in gluten development. With each stretch, the dough becomes stronger and with each fold the flour, acids, and gases disperse which allows more energy for fermentation to occur.
How To Stretch and Fold
Mix up a favorite sourdough bread recipe and allow for the autolyse (rest time) before starting the first stretch and fold.

When ready for the first stretch, it helps to wet hands. Pinch one side of the dough pulling it in an upward motion to stretch it.
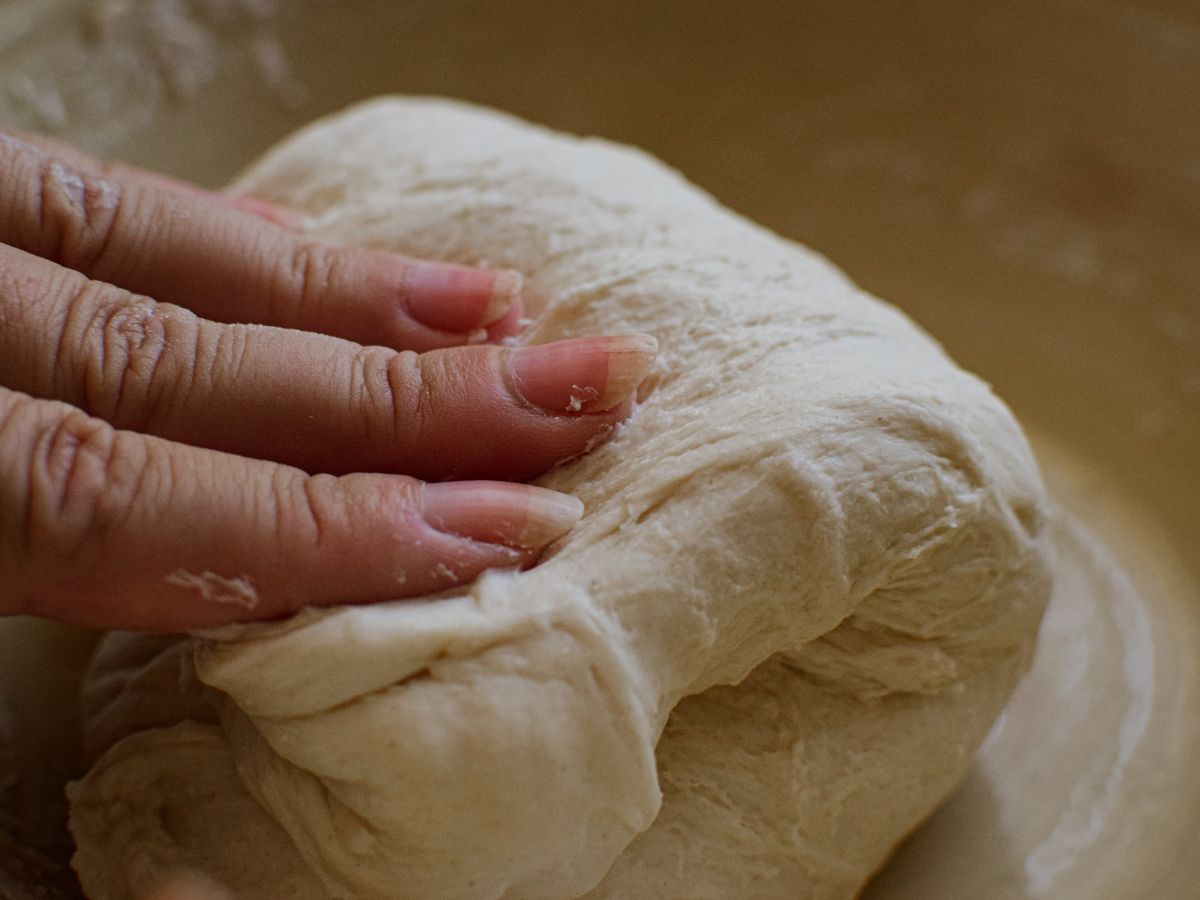
Be careful not to tear the dough. Fold the stretched-out dough over itself.

Turn the bowl slightly and repeat the stretch action by pulling up a corner of the dough, allowing it to gently stretch and fold it over itself.
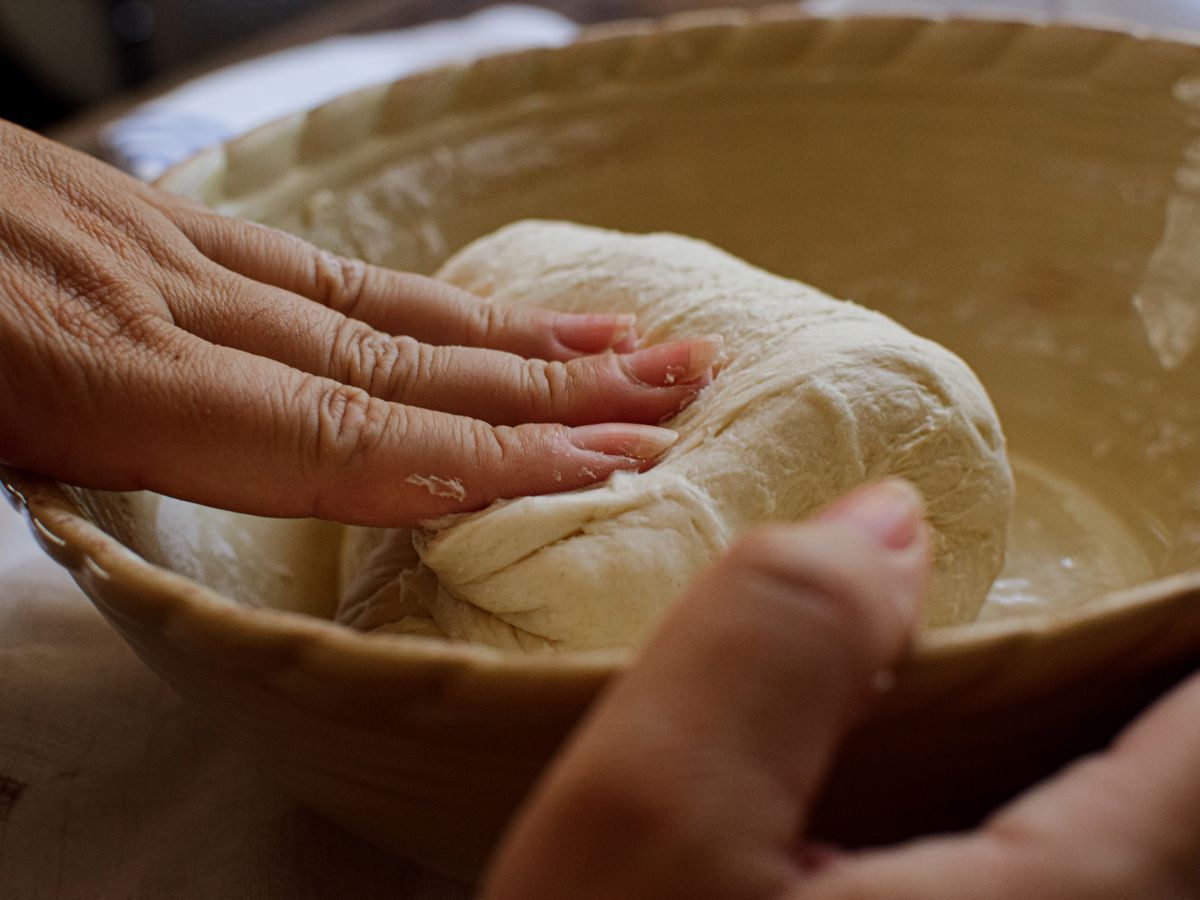
Repeat 4 times total to complete .
Cover the bowl with a tea towel and allow it to rest at room temperature.
Bakers Note: Generally speaking, the sets for high-hydration doughs(wet dough) can be spaced closer because the dough is looser at this stage (as little as 15 minutes apart). For lower-hydration doughs(more on the dryer side), the gluten will need extra time to rest (think 30 minutes to 1 hour). These are suggestions only so be sure to watch your dough and how it is reacting.
Video Demonstration
Tips
- It helps to lightly wet your hands before handling the dough.
- You can do this on a work surface or right in the bowl the dough is resting in.
- The dough can be left to rest between stretches for anywhere from 10 minutes to 60 minutes.
- Generally, most bread recipes will call for 4-6 rounds of stretch and folds with 20-30 minute rests in between.
- Refer to each recipe for suggested wait times but as a general rule of thumb, wait 20 to 30 minutes after mixing up the sourdough dough before beginning the first sets of stretch and folds.
What is Autolyse?
Autolyse is a very simple but effective step in the sourdough bread making process. You might actually already be doing autolyse in your bread baking but don’t even realize it. Autolyse, was first popularized by Professor Raymond Calvel during the time when bread was being industrialized in France. He noted that the use of electric mixers had heated the dough through the aggressive mixing. This resulted in bread that was less flavorful and stripped of color in the final result.
Calvel discovered by letting dough rest, it allowed the flour to hydrate with ease during the early stages of dough development. Discovering that excessive mixing was unnecessary. One could allow for, autolyse, a short rest period, which would yield a better result with less work.
Now autolyse specifically refers to a rest period that follows the mixing of the flour and water. Traditionally, this is done before adding any salt or starter. However, I have seen many recipes that refer to the “autolyse” rest period right after the dough is mixed and before any folding begins.
It can be quite confusing as a home baker. But either way, this rest period is simply referring to the beginning stages of dough development wherein the baker is allowing the dough to rest before working with it. The typical wait time is 20-30 minutes of rest but up to 1 hour is fine.
Bulk Fermentation Stage
This stage refers to the gluten development of the dough which occurs after mixing and ends when the dough is shaped. It is when the bulk of the rise happens.
Stretch and Fold vs Kneading
I have been a long believer in kneading. Namely, because I cheat by using my stand mixer, and this results in a quicker, less complicated but trusty sourdough loaf. But over the years I have slowly started to desire a better loaf overall and knew that my foolproof stand mixer ways were not gonna help me develop any new skillset in the sourdough department. These two different techniques are after the same goal of strengthening and building structure in the dough from gluten development.
Kneading is a traditional way to get stiffer dough to rise and develop strength within the dough. It normally results in a quicker rise time and as I stated, a trusty way to get a loaf on the table. This is especially so when using a stand mixer with a dough hook. Kneading requires more work upfront with several minutes of kneading after the dough is mixed and then a period of rest for rising. It is also more suited for dryer doughs with a faster rise time.
The stretch and fold method is a little more on the advanced side of bread baking. Although it is a lot less labor-intensive than hand kneading. It works especially well for higher-hydration dough that is stickier and harder to handle. It is a much gentler way to build strength within the structure of the dough and can produce a slightly more airy crumb. To my surprise, it was a pretty simple process to master once I understood.
The two methods can produce very similar results and unless a recipe requires a specific method, it is up to the baker which one they prefer to use.
FAQ
How many times should you stretch and fold sourdough?
Most recipes call for a total of 4-6 intervals of stretch and folds. Refer to the recipe you are using for the best suggestions. Each interval of stretch and folds should consist of 4 times of stretching and folding the dough with at least a 15-minute rest between intervals.
The rest time can range from 15 minutes to 1 hour between stretches and folds. Remember do not start the stretch and folds directly after mixing the dough. The first set is usually done 30 minutes into the bulk rise (after you have mixed the dough).
Can I increase the amount of stretches and folds for a more open crumb?
Some people do think that the more stretches and folds one does will result in a more opened crumb. But that is not the case. You want the dough to develop enough strength so that it traps gas and holds its shape. However, you do not want it so strong that it won’t expand in the oven. I suggest following the sourdough recipe’s recommended stretch and folds as written.
What is the hydration you refer to in the dough?
Hydration is basically referring to the amount of water in the dough recipe. So literally the percentage of water compared to the amount of flour. This can seem very overwhelming when thinking of calculations in baking but trust me it really is simple. Here is a great Sourdough Hydration for Beginners article to help.
Shop This Post
*Disclaimer: This post may contain affiliate links, which means I may receive commissions if you choose to purchase through the links I provide (at no cost to you).
Pin For Later


